
Sneak peek: A detailed description of what I will be teaching during the first week of heritage speakers class this year.

It’s the start of my third year teaching a heritage speakers class! I don’t know about you, but even as my seventh year teaching begins, I still get anxiety about the first week of school. I have found that one of the best ways to reduce my stress is to lesson prep. Doing this provides the soft re-entry back into the teaching grind. We can probably all agree that eased transitions are needed after a long (but never long enough) summer break. For me, this looks like my lesson plans being typed out, printed off and ready to go for that first week. All of this gives me the confidence I need to face the hectic chaos of getting into the groove again, as well as mental clarity in knowing my bases are covered in the very least.

*This post contains affiliate links, which means that if you click through to one of the product links, I’ll earn a small percentage at no extra cost to you.
First Week Strategy
As this isn’t my first time around the block, I have developed a few go-to strategies for the first week of school. You will find these strategies implemented in my lesson plans, and hopefully, also find them quite helpful!
Wait on Seating Charts
I prefer not to assign permanent seats on the first day. In fact, I usually wait until the second week to knock out this task. Since I don’t know my students yet, I don’t know who to keep separate. Additionally, student class schedules are in a state of complete flux at first, with last-minute changes, drops, and students switching from one class-hour to another (not to mention switching schools). Making a seating chart too early is a lot of work, at first, and more frustration for you later when you have to amend and amend again! So for the first week: focus on the students, appreciate the new group for who they are, and allow some of the administrative aspects of the job to wait for a more concrete moment to sort themselves out.

Allowing students to pick seats on their own right away saves you the hassle of having to prepare something ahead of time. Bigger picture, the beauty in doing this without any warnings, directives or precursors is that students then show you who they should not be allowed to sit near. Perhaps they sit near their friends, but are mature enough to make it work? Perhaps not. But now, if they should not sit near someone due to being disruptive, it’s because they showed you as much.
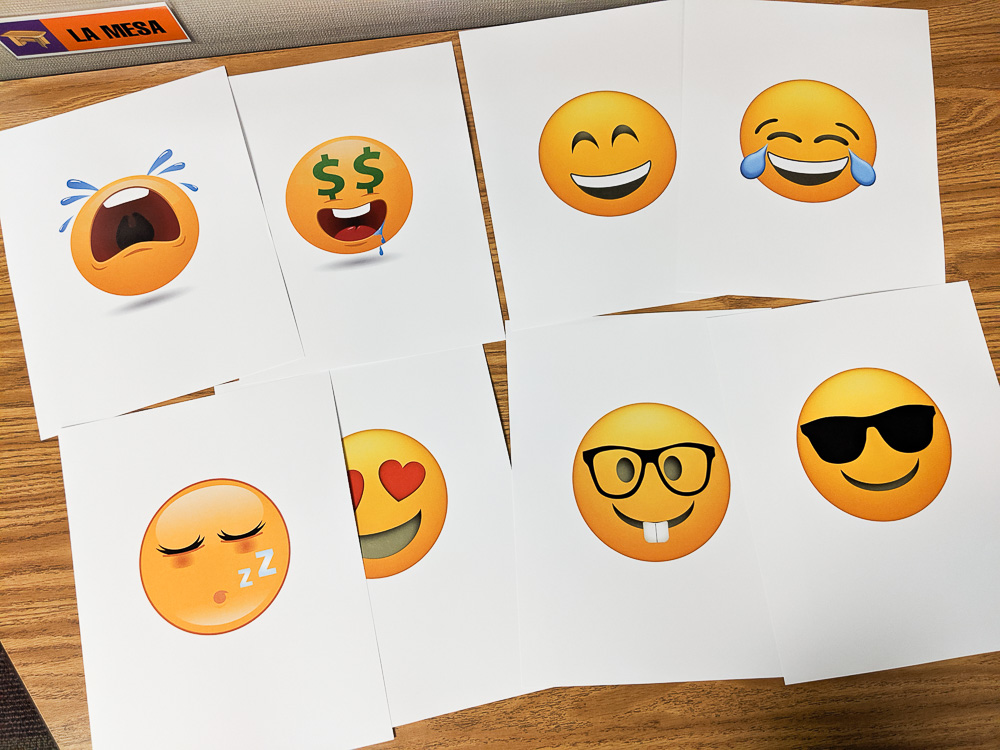
Sometimes, I like to assign a temporary seating chart. In order to make this easier on both me and the students, I use grouping cards. Picking a seat from a sea of empty desks on the first day can be anxiety-inducing for students. For those with the first day of school jitters (the kind that can make some unsure of what to do with their hands), being handed a card with the simple task of matching it to their seat as soon as they enter the room is a welcome distraction. This year, my plan is to use emoji cards in order to assign students an area of the room to find a seat and quickly form groups for our first activity (these emoji cards are available in my Freebie Folder). This variation is a mix of both options described above. Students aren’t assigned a specific seat, rather an area of the room, and they will also begin to show me who they can and cannot handle being near.

Icebreakers
In general, I like to include a lot of icebreakers and group activities in the first couple of weeks. Why? The first few days of school are often an onslaught of rules, syllabi, and official business. Giving your students a break from the monotony and repetition is a great way to make a positive impression in the minds of your students that heritage speakers class is somewhere they want to be, and something they want to contribute to. Building community is important in any classroom, but I believe it to be especially crucial for a heritage speakers class, as the classroom dynamic greatly affects how deep we are able to dive into our group discussions. The level of comradery formed in my past heritage speaker classes is unlike anything I have experienced before. Forming a close-knit group is what this is all about! Each student provides something beautiful and unique to contribute to the class. Whether that’s personality, high intellect, a caring nature, fun disposition, personal insight, or a unique world-view, it matters a great deal that each heritage-speaker student is able to express themselves and engage.

This year I’m really excited to try out an icebreaker idea I got from The Daring English Teacher. The icebreaker REALLY breaks the ice as students anonymously share their deepest secret on a notecard. I’m excited about this activity because although students won’t know who shared a given sentiment or secret, it is the start of creating a culture of openness and vulnerability. These two traits are among some of the most important characteristics in the bulk majority of the impactful moments from my first two years doing this. Cultivating both of these traits will be essential for your heritage speakers class considering all of the hot topics you will likely be addressing this year.
Student Placement
In my heritage speakers class, the first week of school is the pre-eminent time for student placement. The concept at play here is “lead, and lead early.” It’s extremely important that I figure out as quickly as possible if students have been misplaced in my class. I hate to admit it, but my first year teaching a heritage class, I did not realize that one of my Latino students barely spoke Spanish and had just been copying the work of other students in the class.
Every student has to start somewhere; however, you owe it to all of your students as a collective to ensure that every student in the class is capable of doing their own work. Unfortunately, wanting to be in the same class as their friends, does not meet the minimum Spanish-level required.
To learn from this particular mistake, I began conducting mini-interviews with each student individually. In one sense, it’s less stressful for the student as they do not have to open up the year with a fresh round of public speaking. But additionally, it’s important that the mini-interview be one-on-one so students don’t have anything or anyone to hide behind as it relates to their ability to communicate. Also, I can get an accurate sense of where they are in their command of the Spanish language.

Assigning individual work to the class will allow you to call up students to your desk one-by-one for a structured interview that helps you quickly assess their Spanish skills while learning a few things about them.
***Side note: I also do this in my Spanish 2 & 3 classes because sometimes I have students placed in those classes that should actually be placed in my heritage class.
In short, schedules are very much in-flux during the first week at my school. Since student placement is still in the works during that time-frame, I actually wait until Friday to share about my life and go over classroom procedures. My hope is that by Friday I will have students placed in the right classes, and I can begin to set up our classroom routines. For commonality and camaraderie purposes, it is best to induct all students at the same time, and I have seen great results from waiting until Friday to do so.
Additionally, in most of their other classes, students spend the first day or two going over classroom procedures and syllabus material. My theory is that in waiting until day five for this, they will have finished as much in their other classes, which will have their minds fresh for knocking it out in mine. Heritage speakers class becomes an oasis at first, and when it finally becomes time to address policy and procedure later on in the week, their minds are more fresh to retain the setup!
This year, in addition to the quicker mini-interview assessment, I also created a four-part comprehension assessment. The assessment requires students to respond to questions on a Google Form after watching a series of short cartoons. It’s divided into four sections:
- Video con texto (this video includes subtitles)
- Video sin texto (this video does not include subtitles)
- Texto sin audio (this is just a comic they have to read)
- Audio sin texto ni imagenes (this story is just audio.. Instead of comprehension questions they have to write a summary on a piece of paper).

This Google Form assessment is a convenient and fast way to assess their comprehension of Spanish, in that it is self-correcting. It will also provide you with a short written sampling of their command for writing in Spanish. They do this on paper and turn it in. I find it one of my most valued assessment tools.
I agree with Sean Lawler, whose sentiments are published in the book Practical Advice for Teachers of Heritage Learners of Spanish. He believes that passive listening is the “entry-level skill” for the heritage learners program. I completely agree, because if a student can comprehend spoken Spanish they are already much more advanced than the other non-heritage language-based courses typically offered in public schools across America.
A student who comprehends spoken Spanish well will be completely underserviced in Spanish I, II, and III type classes as comprehensible input is the focus there. A heritage learner that can comprehend Spanish would be properly challenged in being surrounded by fluent students with whom they are able to practice output. Sure, perhaps they could undercut their potential, coast easier and get an “A” in a conventional Spanish class, but the goal in education is to challenge the mind and cultivate growth.
So as educators, it’s our job to sniff out situations where learning will not occur to its peak potential, and place accordingly! The emphasis on literacy in the heritage course is exactly what this student needs to continue to develop their Spanish abilities.
You can get this comprehension assessment for free by becoming a subscriber. All my subscribers gain access to my Freebie Folder filled with content designed with a personal goal of giving back to the education community and to help out my fellow heritage teachers!
Without further adieu, let’s dive into my lesson plans for the first week of school!
Day One

| DAY ONE |
| Teaching objective: Students will get to know one another while discussing their summer in Spanish. Supplies: –> One Big Emoji sheets (available for free in my Freebie Folder) –> Emoji Grouping Cards (available for free in my Freebie Folder) –> Digital Scavenger Hunt (Google Slides) –> Digital Rewrite Assignment (Google Slides) –> Prize for the winning group Prep: *Print and cut out Emoji Grouping Cards. *Print out One Big Emoji sheets and set them on tables or certain areas in the room. *Upload the Digital Scavenger Hunt to Google Classroom or share the link with students somehow. *Upload the Digital Rewrite Assignment to Google Classroom or your digital homework site of choice. Lesson plan: 1. Greet students at the door and tell them to choose an emoji card based on how their summer went. Tell them to find a seat near the sign that matches their emoji. Eventually, towards the latter half of the class, students will just need to take the Emojis that remain. 2. Ask students to sign-up for Google Classroom/Schoology (so students can access the scavenger hunt and rewrite their assignment later in the lesson). 3. Once everyone has signed up, tell students to group up by finding the people that chose the same emoji card. **You can also use this to assign temporary seats for the first two weeks as you get to know your students. If you have your classroom set-up in pods or tables it would be easy to put a bigger emoji on each group of tables. 4. Students will complete the Digital Scavenger Hunt in their groups. If groups seem uneven, quickly reassign a few students to level out the playing field for this activity. Students will need to upload actual pictures and photos from their summer to a digital document in order to complete the board as a group (think: blackout bingo). Each group will need at least one device & students will need their cell phones. If you don’t usually permit cell phones in class, give them special permission for this activity. The scavenger hunt has a variety of summer activities. Students in the group must work together to prove that between their entire group they have done all of the items listed on the board this past summer. They prove it by uploading their photos to each square on the digital board. Each group is competing against the other groups. The first group done, wins! Give this group a prize to make things more exciting. Once you have a winner, you can move on to assigning the rewrite activity based on the digital scavenger hunt. 5. Students should complete the Digital Rewrite Assignment you uploaded to Google Classroom (or your other digital homework site). Their task is to rewrite the sentences from the scavenger hunt from the first person to the third person (practicing with the preterite tense). Students should work alone on this project. |
Day Two


| DAY TWO |
| Teaching objective: Students will reflect on how much exposure they have had to English & Spanish in their daily lives. Supplies: –> Mi mapa de input lingüístico –> Mini-entrevista sheets (available for free in my Freebie Folder) Prep: *Print enough copies of the Mi mapa de input lingüístico for your class. Lesson plan: 1. Pair up students. They should work on page one of the Mi mapa de input lingüístico packet with a partner. First, have them read the paragraph aloud and then converse using the questions listed. After they have discussed the questions they can go back through and write responses. 2. Once it seems that most students have finished, have students return to their original seats. Introduce the next few pages of the packet by briefly discussing with the class about how everyone in the room has had a different combination and frequency of language input in their life which in turn affects their fluency and bilingualism. I wrote a blog post about this topic which you can read in order to prepare yourself for a short discussion. 3. Explain to students that as they work on the rest of this packet on their own, you will be calling them one at a time to your desk for a mini-interview. Interview students individually so that you can get to know where their family is from, what their speaking ability is like (indirectly feeling out whether this is the right class for them?), and a few facts about them. It is helpful to jot notes down on the mini-entrevista sheets while interviewing students so that when it is all said and done you can keep straight all that was just learned.*Request that students bring headphones to class tomorrow. |
Day Three

| DAY THREE |
| Teaching objective: Students will demonstrate their comprehension of Spanish. Supplies: –> Mi mapa de input lingüístico –> Google Form Comprehension Assessment (available for free in my Freebie Folder) –> Google Form Get-to-Know-You Survey (available for free in my Freebie Folder) Prep: *Link the Google Form Comprehension Assessment to Google Classroom or somewhere students can access it easily. *Link the Google Form Get-to-know-you Survey somewhere students can access it easily. Lesson Plan: 1. At the start of class, let students know their tasks for the day. It’s helpful if you list them on the board, or better yet, in their online classroom space for the ability to access it later/multiple times. 2. Students now have the hour to finish their Mapa de input lingüístico packet, take a comprehension assessment and fill out a quick get-to-know-you-survey. The comprehension assessment will likely take them about 30 minutes, so they may need to complete the survey for homework if there isn’t enough class time. Students should use headphones for the comprehension assessment or work in the hallway so they don’t disturb others. 3. While students work on their tasks, you as the teacher will continue to conduct mini-interviews individually. |
Day Four
| DAY FOUR |
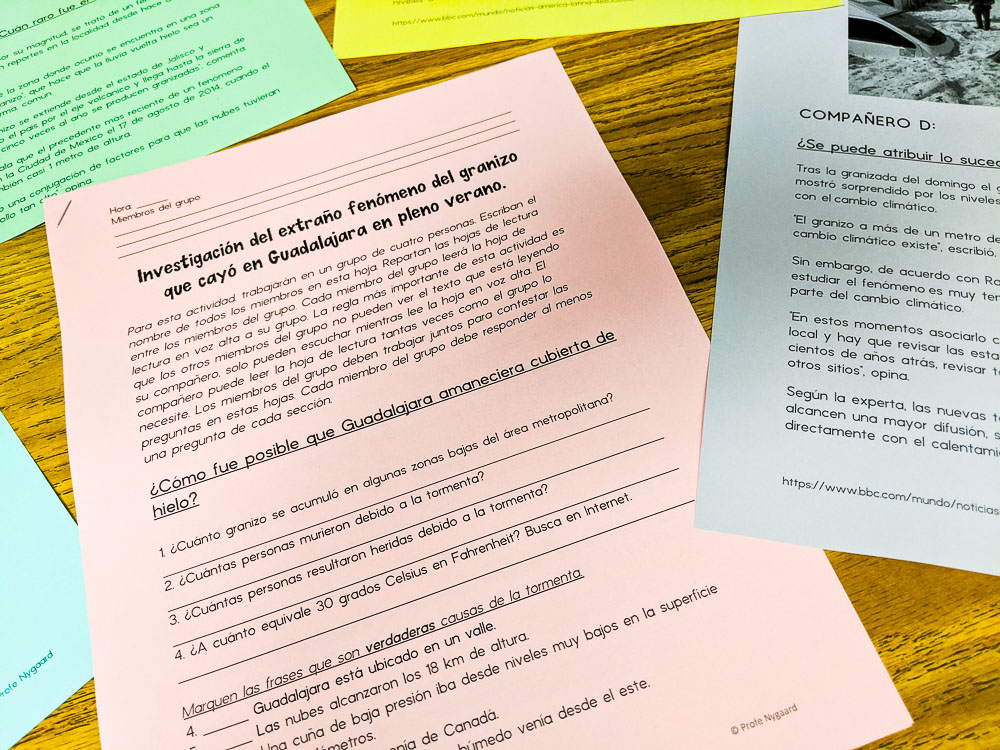
| Teaching objective: Students will read an article in groups. Students will research facts in order to form their own opinion. Supplies: –> la hoja de respuestas –> compañero a –> compañero b y c (cut in half) –> compañero d Prep: *Print out the compañero a, compañero b y c, & compañero d files so that you have enough for how many students there are in your particular class. For example, if you have 40 students in your class, print 10 copies of compañero a, 10 copies of compañero b y c (cut these sheets in half) and 10 copies of compañero d. *Print out enough copies of la hoja de respuestas for how many groups of four your class will divide into. For example, if you have 40 students, print out 10 copies. Lesson plan: There are three parts to this lesson: pre-reading predictions and video viewing (first half of PowerPoint), group reading & worksheet, post-reading whole class discussion (second half of PowerPoint). 1. Use the PowerPoint to introduce this lesson. The images will pique student interest about this rare weather event. Show the videos linked in the PowerPoint. 2. Stop the presentation once you get to the slide that says, “after reading.” 3. Divide the class into groups of four. Pass out one copy of la hoja de respuestas to each group. All students in the group should put their name on this sheet- this is what they will turn in as a group. 4. Pass out the compañero a, compañero b y c, and compañero d sheets so that each member of the group has a different sheet. 5. Explain to students how they will do their reading activity. Here’s how it works: Each person in the group will be assigned an excerpt of the article (either compañero a, compañero b, compañero c, or compañero d). They will each read their excerpt aloud while the rest of the group listens. Only the member with the excerpt can lay eyes on the text, the rest of the group can only listen. For example, compañero a is the only one who is allowed to look at the reading sheet titled compañero a. They may re-read the text for the group if necessary. The group will work together to fill out the answers to the questions. They should take turns being the writer for the group so that in the end they have each had a turn writing down answers on la hoja de respuestas. 6. Once all groups have turned in la hoja de respuestas, close the lesson with a group discussion. Use the second half of the PowerPoint to get students talking about the opinion their group formed regarding whether or not this event is related to climate change. You can have this be a whole-group discussion or you could even expand this activity into the next week by setting up a debate of sorts. It’s up to you! And of course, you can use these materials as an individual activity instead of a group activity if you prefer. While students work with their group, you as the teacher will finish up any remaining student assessment mini-interviews. |
Day Five


| DAY FIVE |
| Teaching objective: Students will familiarize themselves with the teacher, class values and the classroom procedures. Supplies: –> Introducing FVR worksheet (free download) –> Classroom Procedures worksheet –> Notecards or post-it notes (one for each student) Prep: *Prepare a slideshow of your classroom expectations *Print copies of Introducing FVR worksheet *Print copies of Classroom Procedures worksheet Lesson Plan: 1. Start class with postsecret icebreaker. Have students write their secrets in Spanish. 2. Share a bit about yourself with the class via a short presentation or a Kahoot. 3. Pass out the Classroom Procedures worksheet. Go over the classroom procedures as students follow along, taking notes. I recommend preparing a small presentation and then also uploading that digitally so that students can access it later (especially for students who are absent). 4. If you have time, pass out the Introducing FVR worksheet. If there isn’t time, you can start with this right off the bat next week. This will prepare students for next week’s FVR routine. |
What Next?
The following week we will begin our routines: starting class with ten minutes of FVR, Monday through Friday and watching 25 minutes of “Alta Mar” on Fridays. We will also begin our literary analysis unit where students will read a short novel with several other students and work through a packet that teaches them various literary-analysis concepts.
In this unit they will:
- make predictions about the story.
- evaluate the author’s intent.
- illustrate a scene from the novel.
- identify the different types of characters.
- analyze the main character.
- identify the point of view.
- relate the story to their own lives.
- describe the setting of the novel according to different categories.
- analyze the plot.
- summarize the novel.
- describe two events that occur in the novel.
- use contextual evidence to support the answers.
I chose TPRS novels for this because I wanted students to address these literary topics with a book that is easy for them to comprehend so I chose to use readers from Fluency Matters.
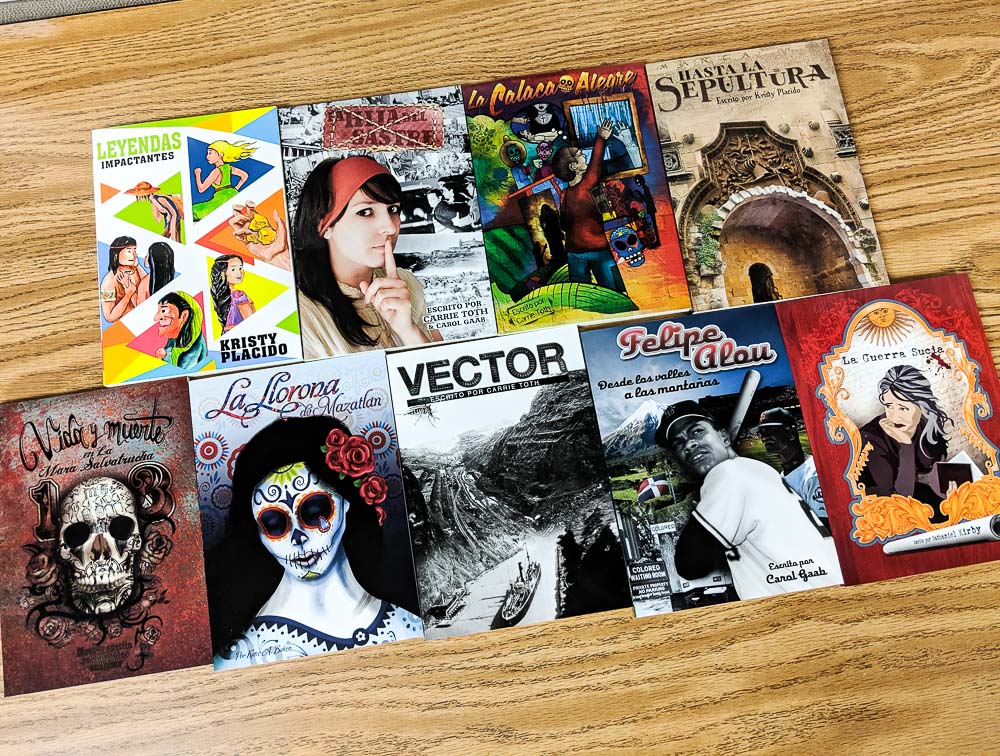
The titles I will be including are:
La hija del sastre by Carrie Toth & Carol Gaab
Leyendas Impactantes by Kristy Placido
La Calaca Alegre by Carrie Toth
Hasta la sepultura by Kristy Placido
Vida y muerte en la mara salvatrucha by Anonymous
La llorona de Mazatlán by Katie A. Baker
La guerra Sucia by Nathaniel Kirby
To save time starting out your new school year, you can get all the materials to teach these lessons by purchasing this bundle and subscribing to my Freebie Folder.
Pin this post for later


